Showing posts with label decor. Show all posts

Sunday, November 8, 2015

Foiled

I'm going to guess it was back in March that I ordered some foil and glue with intentions of taking on this project. Every time I thought about it, I just couldn't muster the interest in trying it. Craftier pursuits don't exactly intimidate me, but it's not really my game the way building stuff is.
So I put it off until this quiet Sunday, and the result was almost exactly what I was hoping for. That never happens. I'd like to take one more crack at them and see if I can get them more heavily foiled, since they look a little more distressed than I wanted. Overall though, pretty awesome.
And now when I see things like this in stores, I think to myself, I know how to do that.

Sunday, April 5, 2015

The Office, Pretty Much Done (!!!!)

This day, like every other "it's finished" day, has been a looong time coming. Not only is pretty much everything on my March sabbatical list for the office checked off, but I did a few bonus projects too. (Out of school for eight years, still looking for extra credit.) 

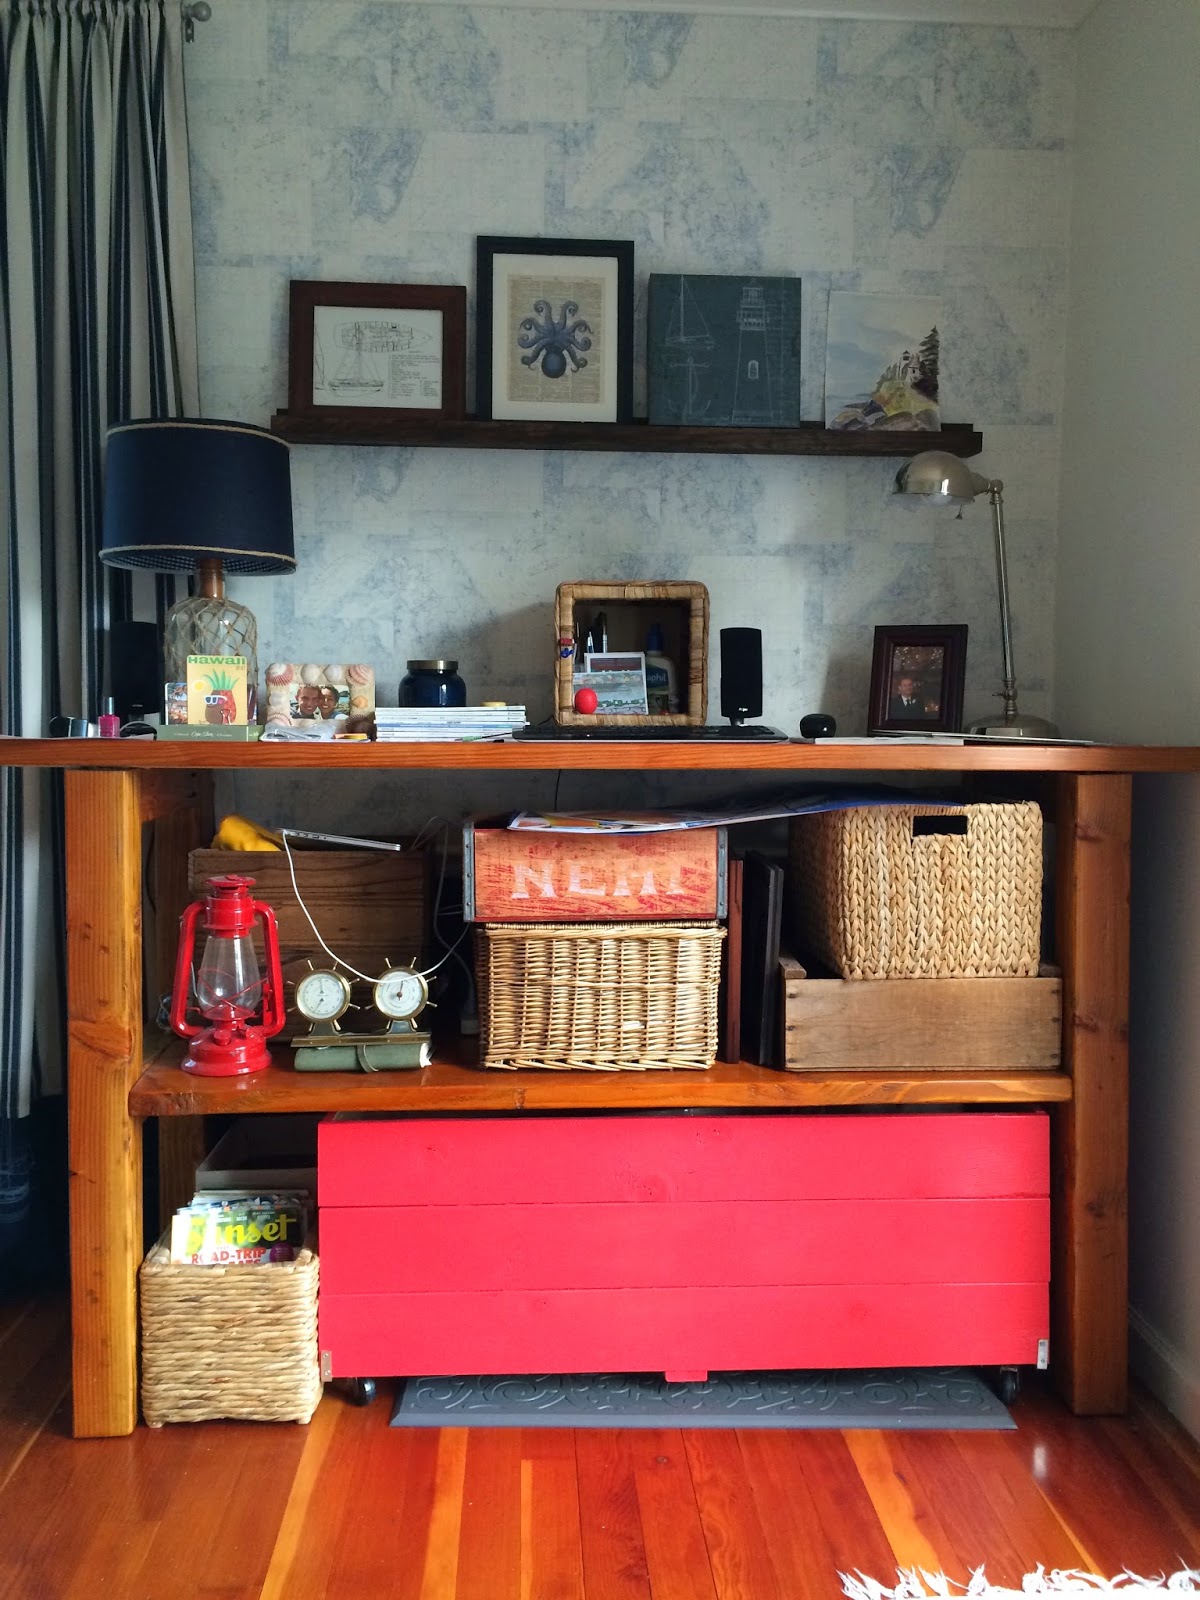
First, the picture ledge. I've wanted something above my desk since we move back two years ago, and I batted around all sorts of ideas. I have this great original piece I got from One Kings Lane three years ago and have yet to frame. It's on top of the crates on the shelf on my desk, where I've been trying to protect it from getting bent or scraped up. It's kind of big though, and I felt like if I did a gallery setup (another idea) that it'd overwhelm the whole thing. It's a fairly large space, but not huge, and just to the right of the lamp will be filled in once I get a monitor. My computer sits on top of the crate in the middle. So I scrapped the gallery and the single piece.

Then I happened upon someone talking about a ledge out in the blogosphere and thought, I could TOTALLY build one of those in like two seconds. More like 30 minutes including finishing time and an hour to install because I was tired and stupid (always a great time to start drilling holes into your wallpapered wall...) but luckily Todd came to the rescue with a great suggestion on how to hang it and saved my wall from many unnecessary holes.
Plus I have a bunch of already-framed art that needed a home. That's not counting the lighthouse watercolor all the way on the right, painted by my talented late grandmother, that I haven't yet put in a frame. Nice associations with each one, all gifts and things that make me happy to look at. Perfect for right above my desk where I spent a decent about of time looking.
I also moved this seashell print so it's centered above the cabinet. Its previous position was a foot or so left, which was where it lived when the room was configured differently. It took me about 3 minutes to move it, and it'd been bugging me for months. I have no idea why I drag my feet on easy fixes like that.

Side note, maidenhair ferns really need even indirect light. I had the one in the terra cotta pot on a shelf on my desk where it got light from the window and the back door, and it grew into this really demented-looking shape, half of the stems pointed at the window, the other half at the door. Hopefully I can rehab its shape.
The fern on the left is a type of Boston fern, which I've heard are rather notoriously fussy plants. This fluffy version is awesome. When it needs water, it just turns a lighter shade of green looks a bit pathetic, and then I stick it in the tub and give it a good soaking. I got it as a teeny start four or more years ago (an indication of its hardiness, since I have for sure killed more ferns than I've kept alive) and now it's almost two feet wide with no signs of slowing down. If I put it in a bigger pot, it might take over the whole room. The dimension of it doesn't really come through on camera, but it's so wild and textured, I love it.
 So, here's my office. I'm calling this one done for now, though I'll probably never stop tinkering.
Lastly, in honor of Easter Sunday, a line from my favorite Khaled Hosseini book, The Kite Runner: Come, there is a way to be good again. Hope this and all of your other days is filled with the spirit of redemption.

Thursday, April 2, 2015

Master Bedroom Plans and Schemes

The master bedroom has never been a done deal. The color offsets the general lack of thought that's gone into this room, but other than the headboard and curtains, I haven't made much headway. Not for lack of trying, but until a couple of weeks ago, my creativity was kind of stuck. I finally got unstuck though and started working on this board.
Unstuck feels much better than stuck. Here's the plan:
  • Art. What I have over the bed is actually a single piece I PhotoChopped as I was playing around; it's from Laura Dro Designs and is part of a collection of amazing ikat pieces. I love her work and have been trying to figure out where one of her prints might belong in the house.
  • I've already painted the pineapple lamps (I took pictures but they seem to have vanished...which is always rather unsettling). Next, figure out lampshade situation. NO ivory.
  • Gonna hack some Ikea Rasts and paint them (probably) a weathered black.
  • Bought canvases to do some painting. Unbelievable deal at $6 each at Joann's.
  • Silver leaf the dropcloth euroshams so they have kind of a weathered silver finish.
  • Get one of those fake sheepskins and make a pillow out of it.
  • Already have the quilt, great deal at Fred's a few weeks ago.
  • Planned accent colors are yellow, orange and fuschia, which Todd has agreed to.
  • Replace the light fixture. I actually think I might be able to sell it; it's a vintage capiz shell flush mount and it's actually kind of cute, just not anymore in this room. Couple of the contenders are on the board. I'm still shopping. 
  • Paint trim/built-ins at some point. This will be a big job. 
  • Need throw blanket. Still haven't figured out what that should be.
Luckily, I still like the blue a lot. Can't wait till this one is a wrap, but the process has been a lot more fun lately. 

Sunday, August 17, 2014

Sprinklers and some fun stuff inside

Sprinklers are officially a go! Please note the 300-some feet of pipe strapped to the top of my car. The Home Depot guy was not confident about our use of ratchet straps, but those things are the greatest. 
So now our front yard looks like this. Back yard is similar. Lots of small trenches. Todd's dad (who's heading up the project) used a Ditch Witch to dice up what remains of our pathetic lawn. (Also I recently got an iPhone 5 and am working on mastering the panorama shot.)
Inside, I hung the floating terrariums I bought a couple months ago. My air plants arrived earlier this week and will be living in them, hanging in the kitchen window for now.
This one has three: it's a 6-inch diameter bubble and has a big plant and two small ones, one at 4 o'clock and one at 7-8 o'clock.
 This one just has one; it's only a 4-inch diameter.
Cool, huh?
I also (slightly intoxicatedly) did this to the powder room trashcan. The idea was devised while fully sober, but Todd pointed out that I might regret executing a drink and a half in. He was sort of right, although I could also argue it adds to the desired irregular nature of the pattern. Anyway...this bathroom is slowly getting a little more personality. (And it was really good gin from Bendistillery.)
And this variety of asparagus fern is living in the back entry. Seems happy so far. It's so fluffy!
And lastly, I painted the artichoke lamp in our bedroom a lovely glossy white from the tan-with-gold-glaze it came as. I'm still working on finishing up the plan for our bedroom. Missing art, bedside lamps and possibly a couple accessories, depending on how the lamps turn out. Something about this still seems a little disjointed to me, but I'm sure it'll come to me eventually.

Monday, July 28, 2014

The saga of the kitchen trim

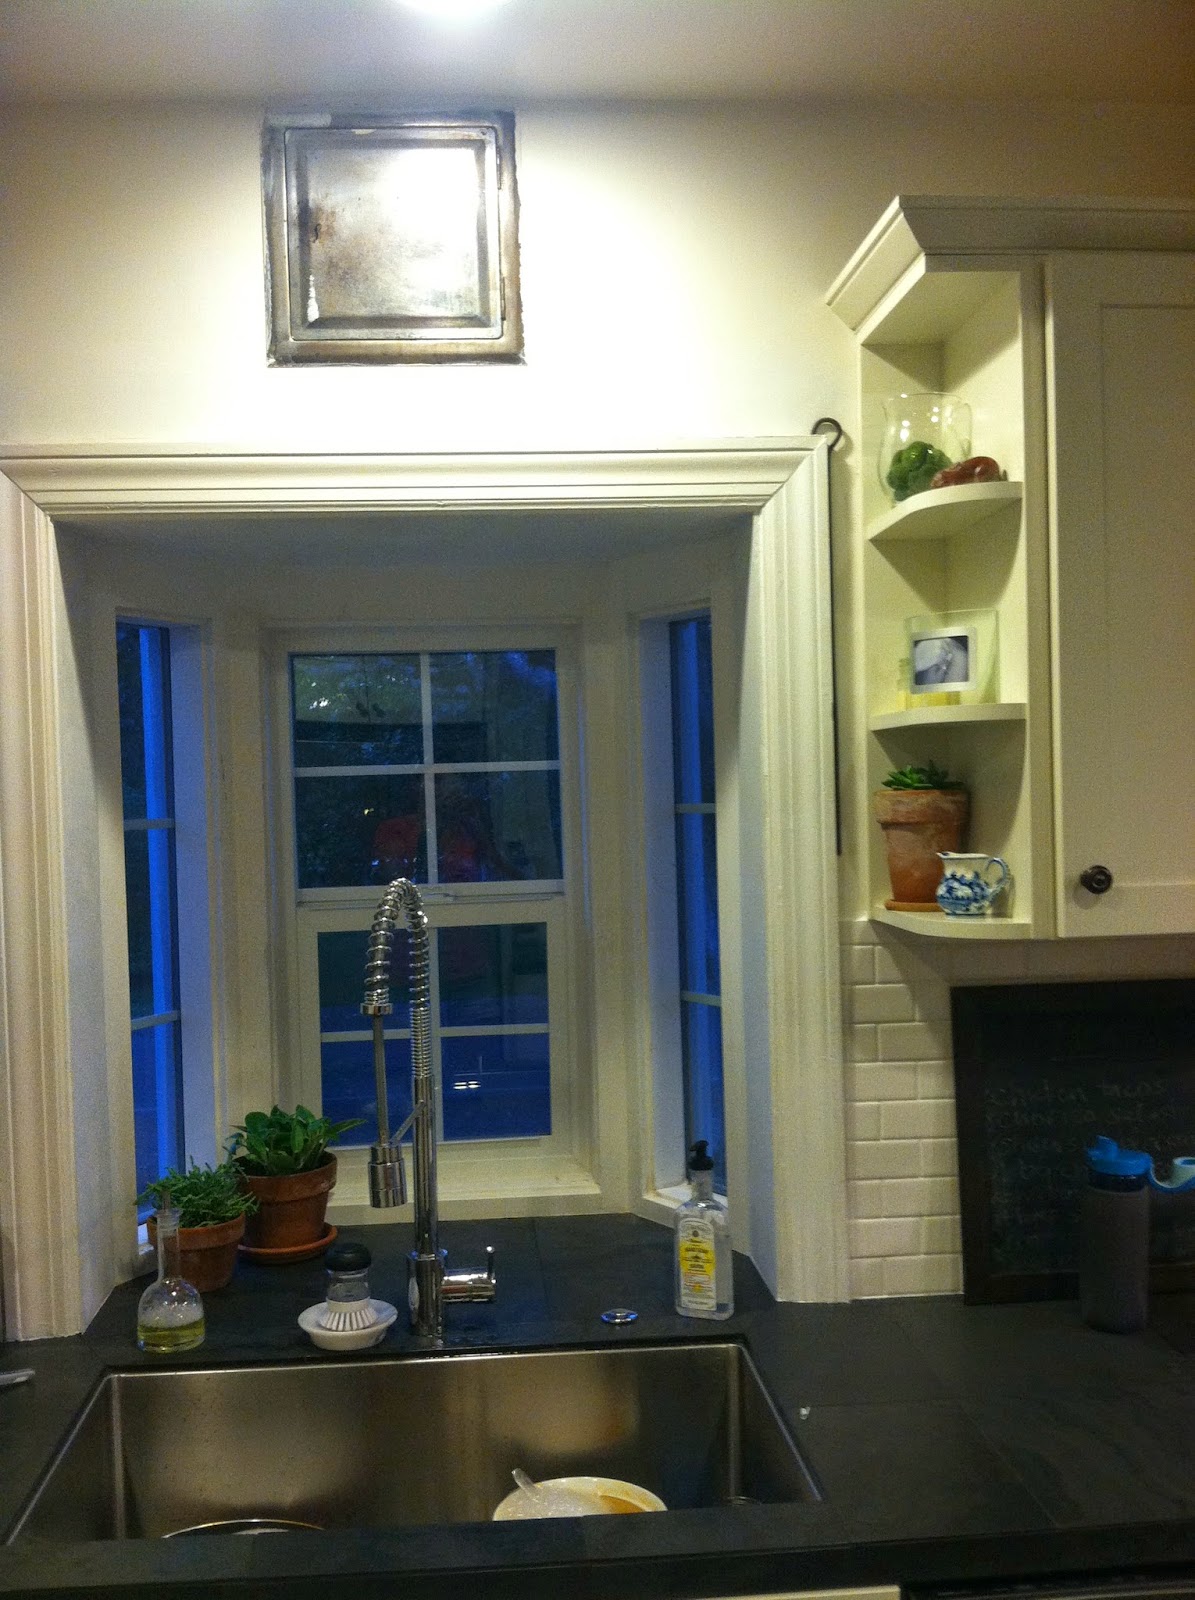
Yesterday afternoon, it was broiling and humid outside so I decided to work on something inside. The kitchen trim has been grating on me for a while, so I grabbed my caulk gun and went to work. I dislike this project because it's multi-step and the parts that need to be done first aren't very gratifying, like caulking unprimed wood. Anyway, here's the window over the sink before. 
Before from straight on...you can see the wood on the sides and top. 
And here's the icky shape the trim was in. Now unfortunately, because we are suspicious that we likely have some lead-based paint somewhere in the 72 years of layers of paint on this casing, I wasn't going to sand it. I used a lint roller (you laugh, but it works!) to remove any loose paint and gave it a wipe with a damp paper towel before Kilz-ing it. 
This is after I primed. I told you it wasn't very gratifying. It does look better in person, and there's a nice crisp caulk line along the counter all the way around that painter's tape. That is gratifying. 
The trim around the kitchen window is now primed, which is a wild improvement that's hardly visible on camera. The rest of the trim is either primed or painted. What's annoying about that project is that it doesn't really look significantly better, it just doesn't look crappy anymore. That's what nobody tells you (ok, my parents both warned me) about renovating old houses. So much of it is just bringing it up to a certain baseline of acceptability before you can start improving on anything. 
I also did some more serious work styling the shelves that flank the windows. I had some random stuff there, but that's pretty much what it looked like: random. stuff. 
 Still a work in progress...
 And we'll see how far I get not killing the succulents I've started collecting. TBD.
I love this. That aged french florist pot and little Delft creamer pitcher. It has a small tray and a sugar pot that it goes with. Maybe I'll pull the other pieces out and put them on a shelf too. They're in my china cab right now. They were my grandmother's pieces.
 I'm becoming a bigger fan of identifying what I love in decor and filling spaces with that. It's evolving, but I find myself drawn to rustic wood, aged terra cotta pots (shocker), blue and white pieces, anything cobalt blue, crisp white finishes against dark wood especially with green plants...
One of the decor blogs I follow posted a palette of her colors throughout her house, and I like that idea. Given the moment of crystalizing my own tastes I'm having right now, I created my own whole house palette:
It's a lot, I know. But somehow it's working, I think because it's usually offset with some metallic (gold or mercury balls) and a "big" texture: jute, woven baskets, wood. I usually don't go with all the colors in one room; our bedroom is cobalt, yellow and tangerine with lots of white. The living room is red with cobalt and navy accents and a heavily textured jute rug. The dining room is navy, white, moss green (literally, moss...) and a little orange, again with heavy texture from the grasscloth wallpaper. 

The guest room, kitchen, entry and powder have had me stumped for a while because they're like the inverse of the other rooms: where I've had major color backdrops to work with, this is white, with white cabs and dark floors. Pulling in the pots and the greenery is helping me crystalize. I've been trying to figure out how to pull in cobalt and orange or possibly lime for the downstairs rooms, but haven't gotten there yet. 

Upstairs I'm still stumped, but that's ok. It's a process, and I finally feel like I have some kind of framework after this weekend, when I spent hours on Pinterest distilling what I was drawn to in certain images. It was a good and productive exercise for a groggy Saturday. It's weird, turning it into more of a science. Everything I've done with this house so far has been freehand and by some combination of chance and my eye for things, it's worked together. I think this is a good move and will help me start finishing rooms so I can stop thinking about them and just enjoy being in them. What a concept...just living in a house :)

And lastly, our most expensive investment in a while. Here's our lovely new roof. We opted for a lighter color for better energy efficiency. I'm working on adjusting to it. Kind of wish it was a little darker, but I'll get over it. I just realized how actually horrific our back yard looks here. I've gotten used to it (a particular type of coping us renovators develop) but wow...what a mess. That's going to change soon though. 
P.S. Have you ever seen a bluer sky than that? That's Oregon in the summer, folks. It's so blue you can't even look at it. You just can't beat it. 

Monday, March 31, 2014

Holes in the Walls

First, my big-ish project. See that mirror? I built the frame :) I finally (embarrassingly) got around to watching a video on how to properly use my Kreg Jig that I got a couple years ago and discovered (rediscovered, because I haven't built anything in quite a while) how ridiculously easy it is. I should take some close-ups, but that frame is perfectly square, level and sturdy. My skills are improving. Also, the mirror has been in there for over 24 hours, which is my "we're safe, project isn't going to fall apart very loudly."
The mirror was from the upstairs bathroom and it measures 29 7/8" wide and 60" tall. Pretty good size. I was originally going to frame it in 2x8s, but I couldn't find kiln-dried ones at Lowe's or HD, so decided on 1x8s. More expensive, but resulted in a somewhat lighter piece. Anyway, I LOVE it, Todd is tolerating it, and hopefully it will reflect more light into our rather dark living room.

This was my b-day present from Todd. It's a super-awesome mini drill. It came with two batteries (!!!) and is extra torque-y. I love it. It's not as torque-y as my electric drill, but they each serve different purposes. Plus, more portable. My other cordless drill Dad gave me in college finally bit the dust, after about 5 years of the battery being left on the charger 24/7 because otherwise it was always dead, and it's just easier to do stuff if you have two drills going. (One for pilot holes, one for screwing stuff in. Obv.)
This was a b-day present to myself. (Not the bucket.) It's a Bucket Jockey and it holds my tools portably so now I don't have to leave a trail of screwdrivers and drill bits and other stuff through the house when I'm working on projects. It has TONS of nifty little pockets and compartments and a holster for my drill and spots for bits and pencils and tools and earmuffs and and AND... I love it.
What post about putting holes in walls would be complete if I didn't include at least one unnecessary hole? (Answer: You'd know I wasn't the one doing the drilling if that was the case.) Anyway, someone was industriously hanging keyhooks and neglected to consider how there's not only a 3-inch drop from the screw to the bottom of the hook, but keys also hang down from the lowest point below the screw. Anyway, you can see how the hole in the middle of the two hooks, which I'd planned on hanging the lower hook, was way too high to not have the top hook's keys overlapping. That probably makes no sense. It all resulted in me having to pry an anchor out of the wall, so at least it was fun...
This is what I've got going on top of the "china hut" these days. It's a moss ball in a terrarium on top of a vintage suitcase acquired from my grandparents' basement, next to that orange thing that I love but can never seem to find a home for. This still looks disjointed to me and obviously the photography is top-notch, but one step at a time.
 This is the other moss ball I made earlier in the month with my pickings from the woods on the way home from Bend. It lives in the cloche (below). I used a mix of moss varieties for this one; some hunks even have a bit of lichen still growing. I didn't mess with the ones of the picture at all. It's really that intensely green. UH-mazing.
Here it is in its home on the dining room table. I let it breathe once a week or so and give it a good soak in the kitchen sink every few weeks. We'll see how long it and its friend last, considering I re-used wet floral foam that had dried out, and you're not really supposed to do that. What can I say? I live on the edge.
So anyway, that's what's new. 

Sunday, March 9, 2014

Stairs and other projects

Following the kitchen remodel, I was kind of over house stuff for a while. We've worked on a number of projects, including, but likely not limited to:

  • mudding Todd's office
  • plotting a plumbing project
  • finishing the upstairs bathroom and guest room for friends to come visit
  • priming and painting the entry
  • priming and painting trim
  • priming the bar counter wall
  • finding, sanding, staining and waxing the bar counter
  • a failed doorknob replacement attempt
  • priming the stair risers
  • adding kitchen hardware
  • cleaning and organizing the garage
I just haven't been feeling like writing it all down. So here's a bunch of pictures. First, some befores of the stairs. They were a rather terrible shade of brown, which I have disliked since the glee of removing the green carpet wore off. That was nearly five years ago. This is the first flight.
 And the second flight.
 Wait, here's a before-before. This stuff was like antique carpeting. Dreadful.
And here's a sort-of after. The risers are just primed, but I think it's a massive improvement. Flight one...
 And flight two. Still to be done: paint risers, finish mudding paneling, paint paneling white so it looks like drywall, paint baluster and spindles. Probably glossy black.
 This is the entry, which I primed and painted last week. Good to have that done. I found that lamp at a thrift store (I dislike them more every time I visit one. The lady told me if the lamp didn't work I had a week to return it, and I thought to myself that I would pay the $4 it cost me again just to not have to go back there). I'd planned on busting it up and using the parts, but then I decided I kind of liked it so instead painted it. It really needs a new shade, but its mod shape is working for me right now. Not working for me: the pile of shoes. Hopefully I can figure out a solution to that.
 Oh, this is an exciting one. After scrubbing to remove dried wood glue from errantly placed corbels and patching tears left in the wood veneer from said corbels, I primed the bar counter wall today. This was before I went to work.
 And after. Still needs to be painted, but it's been a long week. I just laid the counter on top, which I hope doesn't sit in place for weeks on end. I want to finish it one night this week.
 Here's the view from above. The wood is just beautiful.
 Down there at the end is a leftover tuft of moss from my little moss-gathering stop on my way back from Bend yesterday. I love moss. I think it's so interesting and verdant and natural and it has such great texture. So I bagged a bunch yesterday near Union Creek and made some moss balls yesterday. I tried to take pictures, but the low light in the dining room (down to one bulb out of three in that awful fixture in the dining room) was thwarting my efforts. They are enchanting and foresty and fascinating. I have one in a terrarium and the other under a cloche and I just love them.
 In the last couple months, I've continued to mess with the styling of these shelves in the downstairs bathroom. I added that green glass bottle in the lower right corner, found at TJ Maxx, and put fake leaves from Michael's in to balance it.
 The bottle is recycled blown glass and it's all irregularly shaped. Normally not what I go in for, but I really like this.
 Heading back upstairs again, we cleared out the hallway a few weekends ago in preparation for some of our friends from Bend to visit for the weekend. I either can't find or don't have befores, but it was awful. You had to hold onto the railing and sort of scoot by sideways.
 Also prior to Kristan and Brian's arrival last weekend, I finally added a transition to the bathroom and patched in the little bit of floor that was missing. Points if you can identify the patched piece. I was going to finish the wood with some poly or something, but I kind of love how it looks against the slate just raw and aged, so I'll probably leave it for a while. I salvaged as much wood as I could when we redid upstairs, so I have a small stockpile if I need to replace it again.
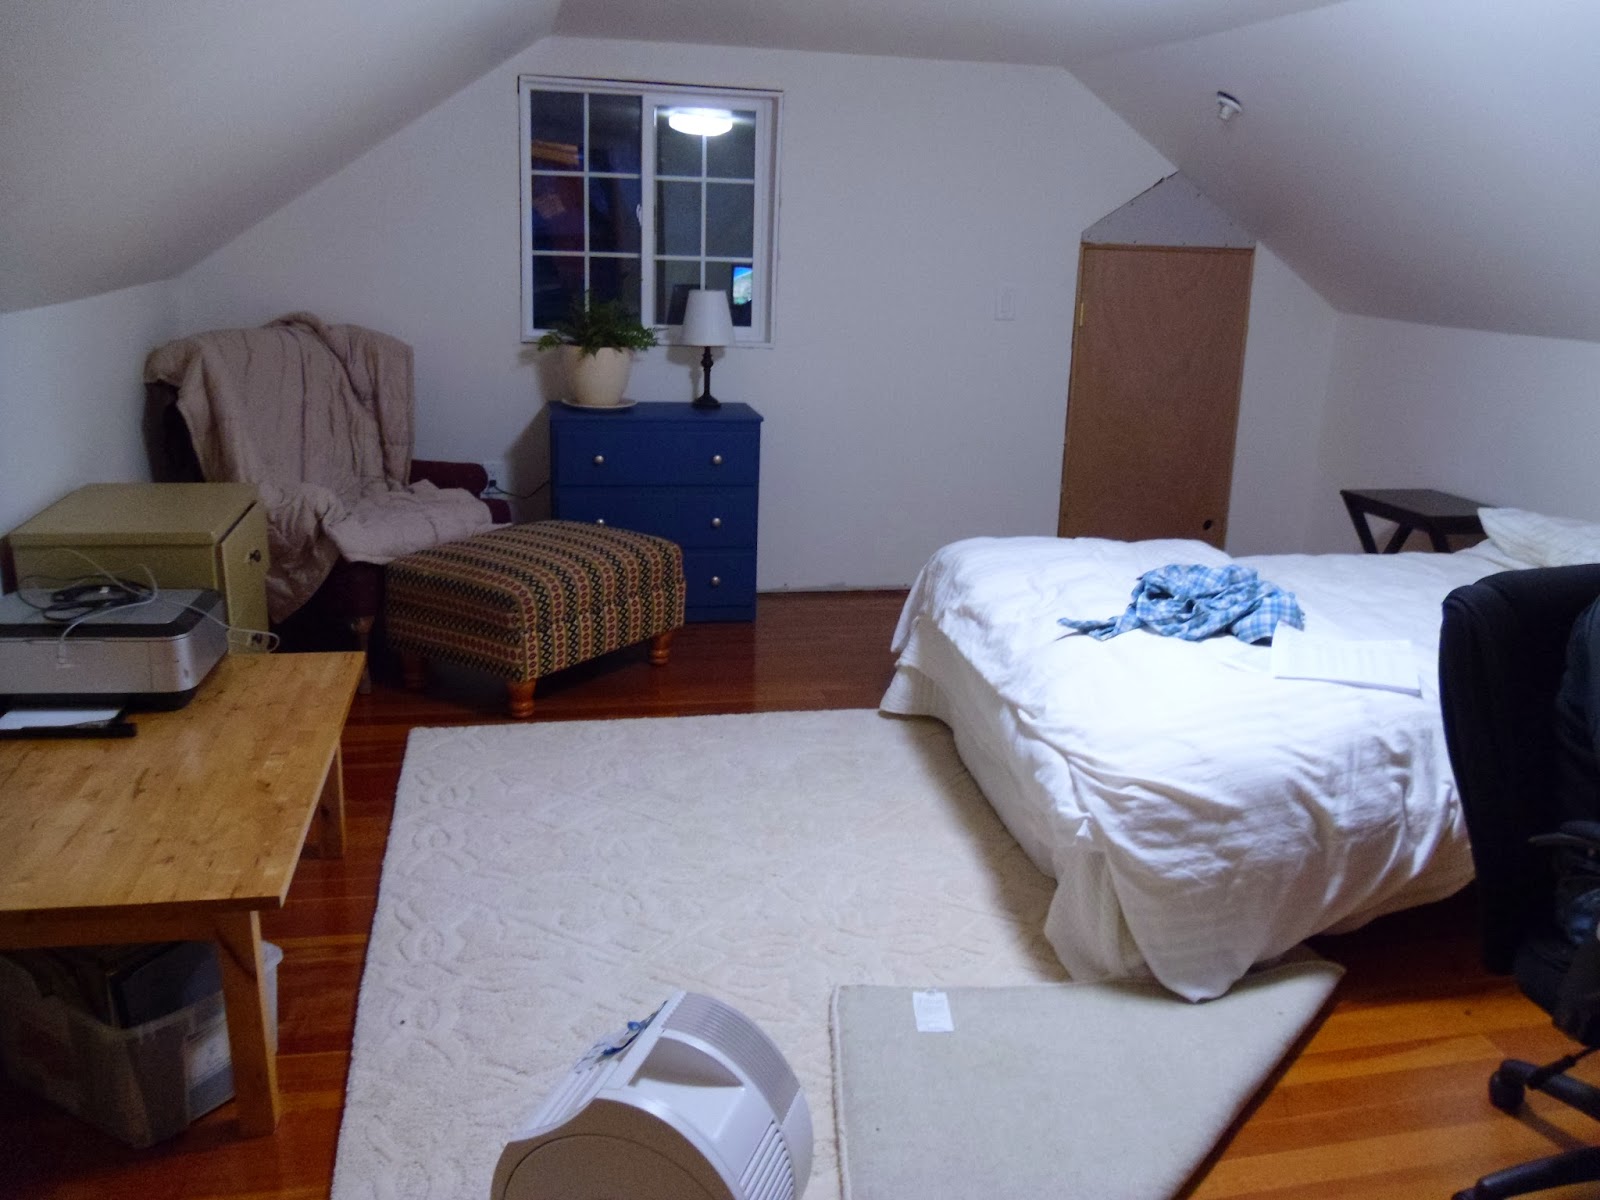
 Here's the guest room. It looks a lot cozier in person, though it is definitely still miscellaneous furniture purgatory. The chair and ottoman in the corner are pieces I snagged a long time ago with intentions of reupholstering. The ottoman will get it this summer. Its twin is downstairs in the living room.

You may also notice the door in the corner. I was eying the space one day, trying to figure out how on earth I was going to make something to close off the attic. Then I grabbed a tape measure and sure enough, it was about 28.5" wide. Just wide enough for me to violently wedge a 28" door into the space, after I sawed off the bottom 30 inches. It was my first door installation, and it totally works!
 One more of the stairs...
 And I found this sign when I was cleaning out the attic a few weeks ago. "This room CONDEMNED by order of the management." Never was a sign so fitting.
Lastly, I will leave you with this. This is a load of old/extra building materials we took over to Habitat. There was a 20' section of pipe, so we had to flag it. The only red thing around was an old oven mitt, which I rubberbanded onto the pipe, and away we went. Watching peoples' faces was priceless as we drove there.