Thursday, February 4, 2010

The Reveal.

Well, dear readers, I am overjoyed to present you with pictures of my ottoman. Yesterday evening, after a grueling 4.5 hours upholstering and batting(ing?), I, with the invaluable help of my sidekick Todd, affixed the final screws on the hinges and flipped it over to have a look:
I am pretty much beside myself with how great it came out. (For those just joining us on this post, I built the frame, cut and stained the legs, cut the foam, etc.) I sat and stared at it for a while last night, basking in the satisfaction of a project carefully planned and methodically completed. If you haven't seen some of my previous projects (pre-house) you're not aware of my tendency to rush through things and end up with a product that's more, shall we say, abstract, than actually functional.

Knowing that, I worked really hard to go slow and be careful, and it totally paid off. I think this is my best, most-purchased-looking piece yet! All told, materials were a little more than $70 (I had to buy a coupler to hook up the staple gun to the air compressor) and I estimate my time spent to be in the neighborhood of 15 to 20 hours. So while $400 still seems excessive to me (especially now that I proved my theory of "hey...I could build that") it does make sense, I guess.

Now, if only I could build something to clean the kitchen (for the third time in the course of this project)...
Here are a few more pictures:

Also, I love staple guns. What a brilliant invention.

Friday, January 29, 2010

Eat your heart out, BHG!

I got irritated this afternoon, coming home with some extra toilet cleaner and light bulbs, with the state of disarray our 2'x3' hall closet was in. I am among what I believe is a significant portion of women who have almost the same reaction to a magazine-caliber organized closet as they would to someone offering them a week in Aruba. I'm 95% sure I'd take the closet over the trip. Sadly, this is what my little closet looked like:
I love the efficiency of this closet: putting an outlet in it was one of the few bright things the builders of our house did. It's also fairly centrally located, providing a nice space to stash bathroom cleaning supplies, a dust cloth (just to the right is the living room) and a broom. I had added hooks a while ago, just to get some stuff off the floor, but there was (and still is) a LOT of underutilized space.

After observing this, I did what any reasonable person would do. I got out the jigsaw and went to take stock of my building supplies in the garage. After coming up with some leftover casing (trim) and a piece of plywood, I measured, cut, painted and installed. An hour and fifteen minutes later, BAM!
Closet 2.0. I made a third shelf, but I haven't decided whether to install it yet or not. Probably yes, but we'll see.

Wednesday, January 27, 2010

Freeing myself from the tyrannical prices of corporate, mass-produced furniture

My latest project has been constructing an ottoman for my office, since I spend a fair amount of time working on the couch. The ones I like tend to be in the hundreds of dollars, like this one from the Pottery Barn ($399)...
which is so not in my budget right now, so I carefully studied the construction of some upholstered benches and ottomans at TJ Maxx, did a little research online, and concluded that I could build my own. I wanted something that had longer legs, rather than bun feet, to avoid taking up tons of visual space with a big upholstered block. I also wanted storage space, because I am constantly tripping over my cell charger, almost sitting on the laptop and pushing piles of magazines and documents around the floor. The PB ottoman above isn't a storage ottoman, so mine's even better!
I had to flip the picture around because the box is upside down on the table right now. First, I built a frame that's 30"x24"x5". This is a rather large ottoman, by the way. Somewhat larger than what I'd envisioned, but anyway... I used a piece of 1/2" plywood that was kicking around the garage as the box top and some cabinet hinges to make the top lift nicely. The kitchen was a disaster of epic proportions when I finally went about cleaning up last weekend. Almost every surface was covered in a fine layer of sawdust from all the cutting, trimming and sanding.

The legs were a real pain. As I was inspecting the only legs at Home Depot had (square with a bolt sticking out one end, for $3 each, plus hardware to attach them) it hit me--"Why can't I make my own!?" Duh. So I bought a three-foot-long piece of 2"x2" poplar and some screws and called my neighbor to offer him the opportunity to cut his fingers off working on my project, in exchange for a brownie. He agreed (he likes brownies) and shaved a bit off each leg (thankfully no fingers were lost or otherwise damaged during this part of the project). This is what one of the pieces of wood looked like, pre-cut. I tested some stain on it, hence the color at the top.
I then sanded, cleaned with mineral spirits, stained and applied two coats of polyurethane (sanding with a 00 steel wool between coats) to the legs. I am really pleased with how they came out.
Foam is pretty expensive and I was worried I was going to have to shell out $35+shipping for a custom-made cushion, but I got a tip about a guy in Medford who replaces couch cushions, and he gave me some used but good-condition cushions, which also had batting attached, so that took a good chunk out of my costs.

Lastly, I had to find the perfect upholstery. I spent hours searching for nautical fabric and found very little that wasn't cheesy or mind-bogglingly expensive before I came across this
on eBay, which was PERFECT. This is the one part of the project where I did bite the bullet and cough up the $40 (with shipping) for 4 1/4 yards (not a terrible price).

So, all in all, here's my list of materials and prices...
wood and hinges for frame: $12
wood and special screws for legs: $6
stain for legs: $6.50
cheap throwaway brushes for stain/poly: $1.25
fabric: $40
steel wool: $1.59
screws, polyurethane, foam, batting, plywood for top, mineral spirits, old rags: free, mostly leftover from other projects.
=67.34...which is a little more than I was expecting

but I'm going to love it when it's done (and Todd will love not stumbling over wires and having the kitchen smell like chemicals).

I also painted that cute little table black, and am formulating plans of copying the design and making some things like it. Jigsaws are great tools.
For the record, I am eagerly anticipating the day when I get to re-upholster the pink wing chair (pictured in the left corner). I have several pieces of navy blue and white corduroy, so the chair will be mostly navy with a white back, and possibly white wings. I learned my lesson about white furniture in our apartment...it's just not a good thing for someone as neurotic as me.

OOH....one more thing...I saw one of these canisters at TJ Maxx (yes, I do spend a lot of time there; it's among the only decent stores in this town) before Christmas, and neglected to follow my motto ("If in doubt, buy and return") and of course it was gone the next time I checked.
Well, they got another shipment and I snapped one up immediately. I think it's maybe for holding umbrellas, but it makes a nice plant stand too. I still have to paint the little platform I made for the top.

Thursday, January 21, 2010

Wallpaper down!

Todd worked on removing the bulk of the rest of the wallpaper in the kitchen last weekend, and it looks SOOOO much better without those dark walls (and having only one kind of wallpaper is a definite improvement too). Seeing these little changes makes me really excited for when we redo the kitchen (still postponed indefinitely, sigh....) because I think it's going to turn out gorgeous.
In case you'd like to compare to what it looked like before, here's that...

Now the "only" problem is those hateful stripey red curtains. I honestly don't know what is wrong with me, buying curtains to quasi-match wallpaper I had plans of removing. BOY do I wish I'd bought blue ones.

Thursday, January 7, 2010

Salvaging is saving, in a manner of speaking

Never one to pass up the opportunity for free stuff, I insisted we stop at a house we passed on the way back from the gym that looked vacant and had two mountains of stuff out front. (Transcript: Me: Look at all that stuff! Todd: That looks like a huge pile of trash. Me: FREE trash! Pull over!)

From the piles, I snagged a curtain rod and a nifty little table (with a broken leg, which someone had taped to the body for future repair). I wanted to go back for the shutters, but couldn't think of where to put them.Though it's a rather unworkable color of pistachio, I have a can of spray paint and I know how to use it. I glued the leg back on with my construction-grade adhesive, and it's currently drying in the kitchen. I'm pretty jazzed about it. Has a lot of character, with the cool metal feet and musical instrument-looking midsection. Also, you know, FREE.

We kicked off the new year on the right food, house-wise. I suggested painting the dining room ceiling, which you may remember from earlier posts was looking especially crappy due to the freshly painted trim. I'd also gotten dining room curtains that I was eager to put up, but that first required painting the curtain rod and finials, so we just went for it.

As usual, this turned out to be a much bigger pain than I anticipated. There were a few spots where the grayish paint was flaking off, and it was nearly a 1/16" thick, if not more, so I thought we'd just sand it down to match. Wrong. In addition to making a mess, I'm pretty sure it looked worse after than before (for those keeping track, that's the opposite of the desired effect). I then decided to spackle it, which kind of worked, except that the infernal gray paint was texturized, to the textures didn't match.

At this point, I was irritated, so I just painted the ceiling (using glossy paint, another mistake). As the ceiling dried, I could see another coat would be in order, and opted for flat paint this time, which helped a lot in hiding the texture issues. I only took one picture of the whole mess...and it looks a lot better in person. The funny section around the light fixture is the old color, then the bright white was the first coat. The final color is slightly creamier. It really helps brighten the dining room, though. and that's what the curtains look like. I'm going to dye them navy blue; you can see the tester swatch almost in the middle of the picture hanging from the top of the cabinet. Todd and I are both big fans of the curtains. It's great to not feel like you're being watched whenever you're in the kitchen or dining room.

Last few things to do in the dining room:
1. Put up crown molding
2. Re-upholster dining room chairs
3. Replace horrific light fixture

Tuesday, December 22, 2009

It's beginning to taste a lot like Christmas

Mostly, Christmas to me is about food (and also the sacred nature of singing Christmas carols at church, which should never be tampered with, but we won't talk about that here). We've been celebrating with food even I wouldn't consider eating regularly during most of the year: caramel turtles, cheeseballs, hot buttered rum, a 3-pound summer sausage...

For our neighbors, I wanted to do something cute but easy, and I think these little baskets came together nicely:
Hot chocolate with smashed candy canes at the top, and marshmallows dipped in a simple syrup (sugar and hot water) mixed with a little peppermint extract then rolled in more smashed candy canes. Smashing the candy canes was fun. I used a paper bag after making a big mess on round 1.

For a number of other friends and family, I made turtles. I've always loved turtles, but they're a bit on the pricey side, so I used limit myself. NO MORE shall I suffer under the tyranny of expensive turtles! Using a recipe I found, I composed my shopping list, purchased obscene quantities of sugar, butter and chocolate, and went to work. My test batch was approved, though I opted to make some milk chocolate rather than all semi-sweet.
Test batch not included, I made 152 of the little reptilian confections. There were turtles EVERYWHERE, on the counters, cooling racks, fridge, freezer, nearly all flat surfaces in the kitchen.
It was a fun project, but boy were my hands ever sore after carmel-ing. They sort of cramped together like claws for a few days after.
And here's the finished product: packaged and ready (almost) for shipping!

For another of our little get-togethers, I improvised a cheese ball. We had a lot of cheddar lying around and some smashed pecans left over from turtles, so I added cream cheese and dry minced onion and some other stuff and presto!It made a yummy companion for the sausage.

Lastly, here's a nice shot of the tree, pre-Christmas morning destruction:

Tuesday, December 8, 2009

"Freezing butts."

Last night, the predicted overnight low was 9 degrees. NINE. Single digits are fairly unheard of in our pocket of the country, so we had to do some things to prepare. Tonight's not supposed to be much warmer, coming in at 12. We left our water trickling so our pipes didn't freeze (yay uninsulated crawl space!) and threw an extra blanket on the bed. Also, this:

which, if you can't tell, is our little laurel shrubs covered in paper grocery bags. And this is our pool, which was covered in a sheet of ice about an inch and a half thick. I have to go bust it up again.
Plants and things (laurels and camellias, mostly) are looking a little ragged, but I'm hopeful everything will survive. I'm looking forward to camellia blooms this spring, which won't happen if all the buds fall off.

Anyway, on to more Christmasy matters. We put lights on our tree last week and were told by our neighbors up the street that it looks awesome through our front window. It has about four ornaments on it right now...I have to finish decorating.

Here's that footed bowl with the pomegranates. They're deepening in color to a nice punchy red, and they look very festive. Isn't the bowl great?

The kissing ball (nod to sophomore year of college) is hung. I need to figure out how to get some mistletoe out of our oak trees so I can hang that, too. (In the background of this picture, please note the wreath hanging on the dining room wall. That was a clearance steal last year, for five measly dollars...marked down from 80. Who pays that for a wreath!?)

Lastly, continuing with the pomegranate decorations, I made this doorhanger that I saw in BHG. It's hanging on the closet in the dining room. Nice little shot of color.
I tried to get creative and improvise another hanging, but I'm not sure it took on quite the style I was hoping for. It kind of just looks like an orange wired to some tree branches. Oh well. Win some, lose some.

Monday, November 30, 2009

Christmas Edition

It was my own tradition, growing up, as soon as we returned from the big family Thanksgiving dinner, to decorate my room for Christmas. The past three years, I haven't really had Christmas, at least not in all its month-long crafty sparkly glory. Three years ago, we were getting married, plus there were finals and whatnot. Two years ago, I was working fulltime, which left little time for festivity, and I lived in a 400-sf house, which left little space. Last year, I was half living in my in-laws' house, and half moving, and we didn't put a tree up until two days before Christmas.

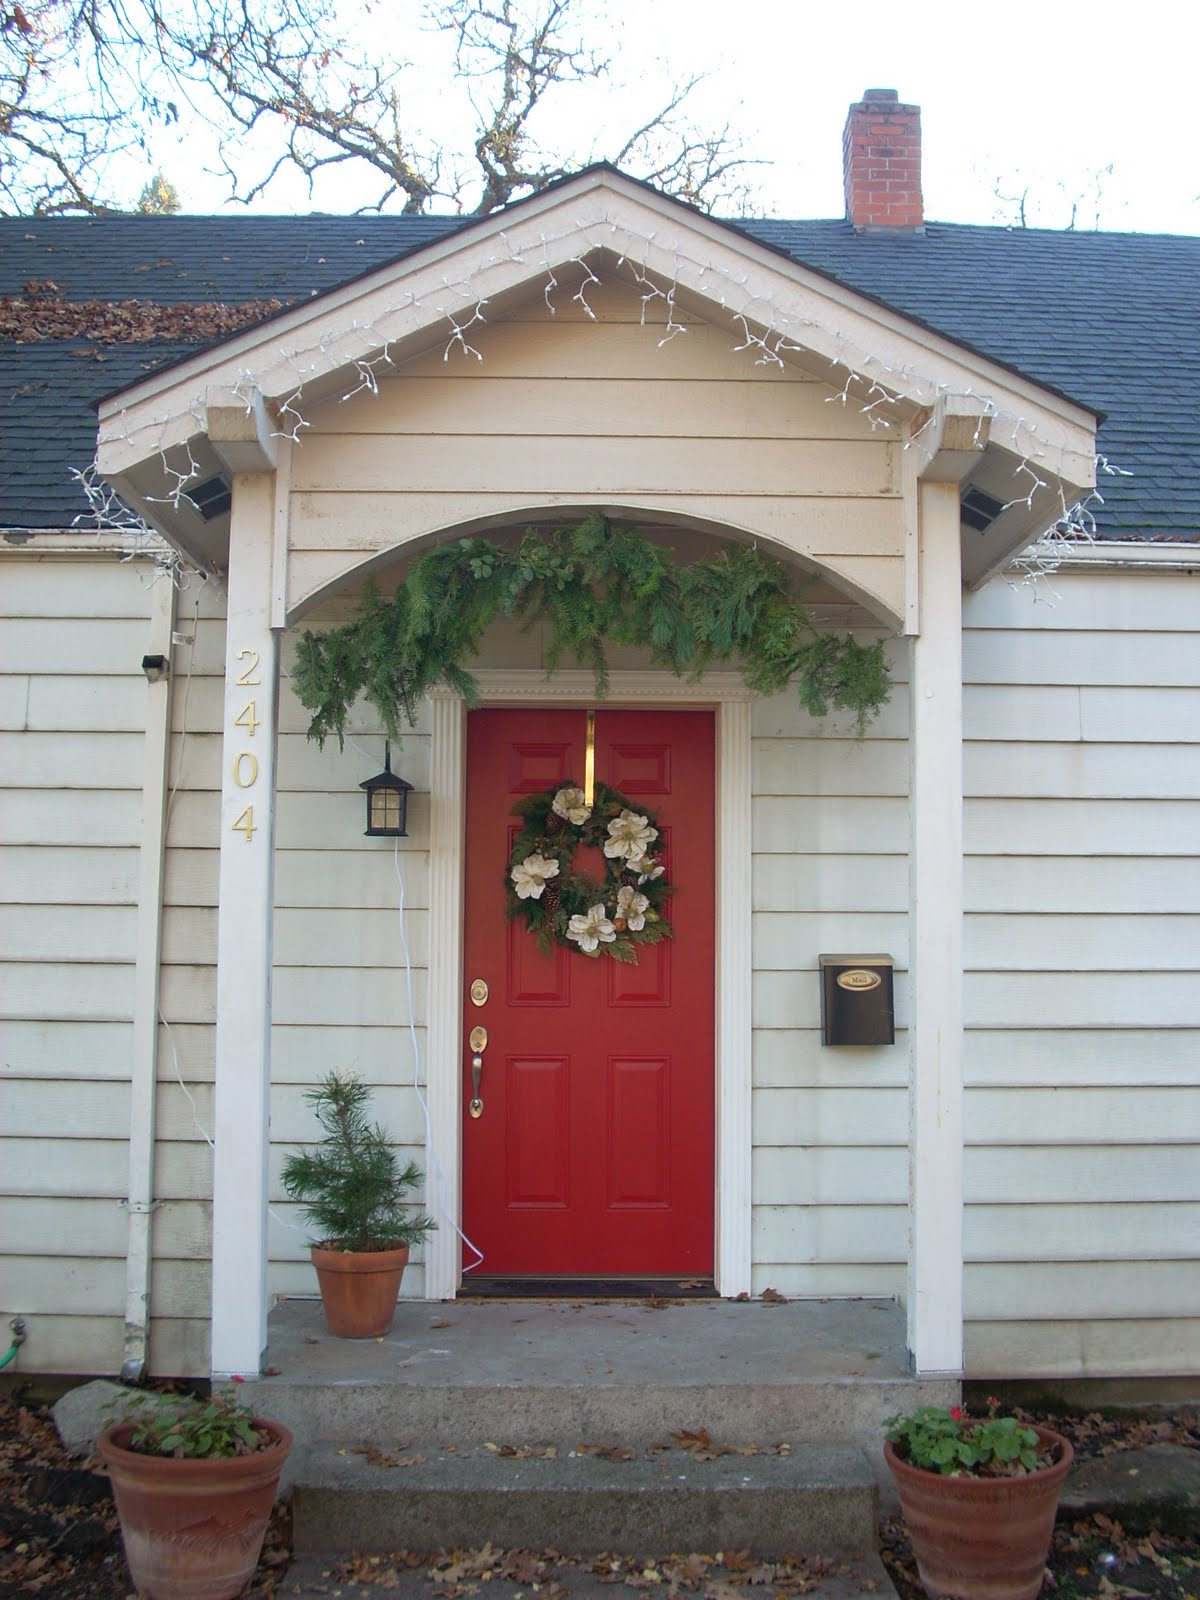
So, you see, I have three years of backlogged cheer, plus a WHOLE HOUSE I get to decorate this year. After Thanksgiving dinner, I kept with tradition and headed for the nearest coniferous tree in sight, a small potted Austrian pine I put on the front porch for this express purpose.It's on the left in this picture. Please also note the wreath, (functional) icicle lights, and garland which I made myself with a whole lot of clippings from the mountains (more on that shortly).

Friday, I lost no time diving into the holidays. After making a huge mess in the guest room with lights and assorted decorations, I slowly began carting things downstairs (to the sounds of the holidays on my "xmas mix" playlist wafting through the house, naturally).

I swapped out the centerpiece on the dining room table (still need pillar candles for those holders) and the porcelain balls on the teak console for this SWEET silver footed bowl with a scalloped rim and little snowflake cutouts that I nabbed at Collector's Market last year. I will be filling it with either pomegranates or clove-stuffed oranges and posting a picture soon. In the background, you can see the red and white tablecloth Mom got me a few years ago!The glass bowl got relocated to the coffee table and filled with these mercury glass balls from Anthropologie (a few years ago...been hanging on to 'em).The mantel got decked with a great fake garland (Michaels clearance, last year) and it looks way more awesome than the picture.Then I got into the crafty side of fun...wreath-making. Never done it before, but I clipped a bunch of holly and cedar branches off the trees in back and made two wreaths Friday and three today. I hung one on the bathroom door (below), the coat closet, and one on my office door. I have a few others I'm still undecided on where to place. They smell great!

Today, I informed Todd that this is my favorite time of year because it involves many of my favorite things: bad food, candy canes, decorating, presents, and rigging. It's likely that many of my old roommates will chuckle at this, given my inclination to install hooks and other creative storage devices in our houses. Anyway, I rigged the garland (see below) on mug hooks. The garland was strung from clippings gathered yesterday on our Christmas tree-picking expedition.
and here's the garland. I added cranberries after I took the picture.Speaking of....This is a picture of me with the tree. (For those wondering, yes, I wear that hat in public, and yes, people do tend to stare at me. Say what you will, but I stay nice and warm.) You buy a permit for $5, then head for the hills where you can cut down a tree. We went with our neighbors up the street, Wayne and Cody, and cut down our trees. It's a little on the sparse side, but they all were. I'm hoping once it's decorated, it'll look more filled out. The shape is perfect, though.I think that's enough Christmas cheer for one post. Stay tuned though, there's way more to come!

Monday, November 23, 2009

Satisfaction.

Today, I did something that's been needing to be done for about 10 months. Gathering my newfound confidence in electrical work, I installed a porch light...
Cute, huh? (We love it. Makes such a difference.) Now it's not pitch black when you walk up to our door at night. Here's one more, from farther back.
That one also features the icicle lights that we put up yesterday, which need to be taken down. Worked two days ago, didn't work once they're up. Naturally.

This evening, we worked on painting more trim and getting rid of that dingy mauve-y color. We painted the bookcases in between the living room and dining room, which allowed me the opportunity to take out the contents and stack it all over the dining room table.
I also painted the inside of the front door, which I didn't take a picture of. It was white, just the primed steel, and I wanted it to match the trim. I don't think it would look that different in a picture, but it does in person.

Todd painted the door to the upstairs in the dining room, so now all we have left is one strip of baseboard (and probably another coat on the bookcases) and the dining room will be...semi-done. Minus crown molding, chair rail, a painted ceiling and a new light fixture, but still, steps in the right direction.

Saturday, November 21, 2009

HAPPY ANNIVERSARY, HOUSE!

It's been one year today since we closed on the house. If you'd like to see how far we've come in this past year, I can refer you here for the outside and here for the inside...yikes, we did have quite a vision. It was ....yikes. And COLD. No heat until mid-December.

Anyway, cheers! Here's to a great, productive year, and many more to come!