Sunday, September 29, 2013

Kitchen Demo and Other Goodies

It is with great excitement that I announce the completion of kitchen and laundry room demolition. When we began Friday afternoon, this is roughly what the kitchen looked like.
Totally dreadful. And a mess, too. It's amazing how knowing you're leaving or emptying a space demotivates us to clean or maintain it.

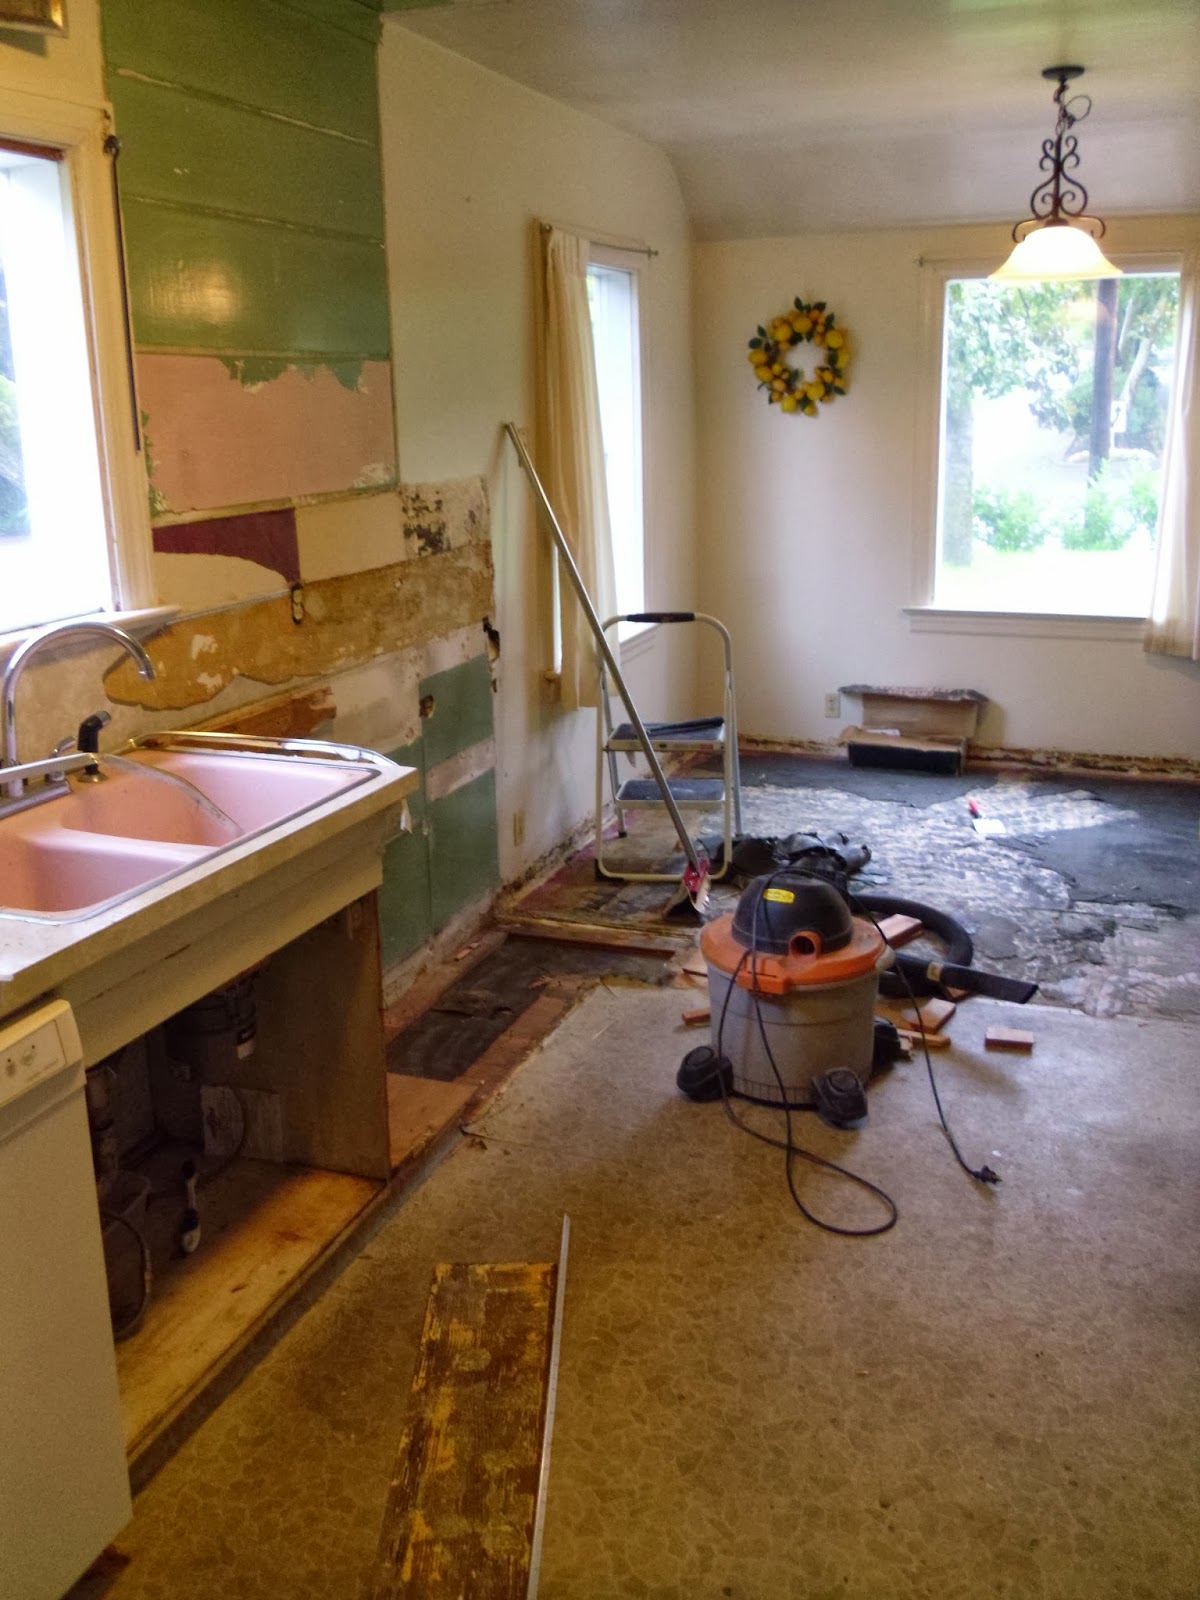
This is the laundry room, with only a few holes in the wall. You can see how narrow and dysfunctional it is from this angle.
I was in a stalemate with the floor since we moved in. It's definitely dirty, but it's really hard to tell how much of that is permadirt. We didn't actually rip that out. Trevor said he can just go over it; he'll be installing 3/4"-thick walnut floors and can just float them on top.
Horrible pink sink. Goodbye. This is still in place though, because the plumber will be here this coming week and it made more sense to let him fix the leaky valves than mess with it ourselves.
Stupid little corner desk that only a 6-year-old could fit at. This, along with every other piece of cabinetry, turned out to be very sturdily constructed and was highly resistant to my giddy Friday after-work attempts at easy removal. The only thing I managed to do was pop two holes in the plaster, and then I got mad and stomped off to find some dinner.
Todd pulled up the gross carpeting in the eating area Friday. That was both easy and satisfying to dispose of.
So by Saturday mid-morning, we'd managed to remove most of the doors and some upper cabinets. Once we got going, it was a lot easier. Except that everything seemed to be held together with about 20 nails. Where a normal person might conclude using two or three would be sufficient, the builders evidently wanted to be on the safe side in terms of possible earthquakes, tsunamis or other natural disasters. Come hell or high water, those cabinets were not going anywhere. Prying things apart was not easy.
The whole process did get a lot more fun after Todd's dad dropped off this splitting maul, which made a nice stand-in for a sledge hammer.
With that and the Sawzall, I made short work of this countertop. Mike (torso pictured) stopped by just moments after I dealt the death blow, let out a victory yell and spouted something about having smote its ruin upon a mountaintop. You say a lot of grandiose things when your brain is adrenaline-addled. It was a rush.
Mike was a huge help. He knocked out half the wall in the laundry room and ripped a bunch of the MDF out of the wall in the garage.

After removing the carpet in the eating area, we got to dig into removing the rubbery foam pad underneath. Not super fun. Suppose it could have been worse though, since we didn't have to get it perfectly clean.
Finding this red pine made us cringe. Evidently in the 40s, laying linoleum of an unidentifiable pattern with a maroon line that ran the rim of your kitchen was more stylish than just finishing this gorgeous wood. There's no salvaging it, not without a lot more work than we're willing to put in at this point. Even then, there might be parts that are too far gone.
In addition to the work in the kitchen, Todd also removed the wilting workbench and sawed it up to fit in the trailer. My suggestion of putting in upright and sticking up about 10 feet was ignored.

This is after I requested a "thumbs-up" picture for the blog. Sunday afternoon, somewhat grudging compliance. Reluctance to be photographed aside, I couldn't have asked for a better partner to tackle this with.
 So this is roughly what we're leaving for Bruce&co, as Todd likes to refer to our contractor.
We're left with a lot of unanswerable questions that would be directed at the builders and original owners who chose so many questionable materials. Like, why did you pick that ugly green paint? Was it really necessary to build that 18-inch-long wall next to the fridge with three studs and countless nails? Did you really like the pink sink, or did you get it on extra-super clearance because all the people who weren't sniffing so much glue in their free time left it on the shelf where it belonged?

These are things we'll never know.
We semi-sealed the kitchen from the dining room and rest of the house, after I spent an hour today swiffering from yesterday's oversight. Neither of us considered how much dust violently bashing in plaster walls was going to kick up. Been a few years since we've gotten this dirty. But we're good to go now, and Bruce will tape off the rest of the area next week.
 One more...
And here's the result of our weekend of destruction. I don't really feel like this picture does the trailer justice. It's really big, like probably 8 feet wide and 12 feet long. And obviously piled well over the brim.
This was an interesting find on one of the cabinets. "Built Dec 19 - 1941 Walter Clark." Frank Clark is a rather well-known local architect; we speculate that Walter was his less-successful younger brother. He was obviously compensating for something with all the nails he used. Kind of a fun find. We wish we had more history about this house, but I suppose all old-house owners feel that way.
Of course, what we really want to know is where the money is hidden. Our cabinet removal yielded another mysterious key of unknown purpose. We've been over this house pretty thoroughly, but we've heard that Clancy, who lived here before the idiots who tried to flip this place for $400,000 (see: the heat didn't work) in 2007, was the sort of crazy old codger who would store his life savings in some random wall. We'll keep an eye out.

Two other bits of non-kitchen news. First, Todd's dad has begun painting the house. Here's a close-up. The left is primed, the right is not. It looks like it could just be the lighting, but it isn't; it's really that dramatically different.
You can't tell as well from this picture, but whatever. New shutters and gutters will be going up at some point soonish. 
AAANNNNDDDD... Those delinquents who were building the fence finally finished. I probably haven't ranted about this yet, but it took them three weeks from start to finish. One day to dig the holes and put in poles. Then a week and a half later, they showed up to put up half the slats. A week after that, they finally decided to finish. 

I shouldn't complain though; it looks really nice and our yard is a ton more private. The dead shrubs are gone and the neighbors' dog can't see us anymore and consequently doesn't bark at us all the time. 
So we've covered a lot of ground in the last week, and definitely in the last two days. The guys will be here while we're gone for work this week, so it'll be fun to see any progress that happens while we're out of town. The wall between the kitchen and the dining room should be gone when we get back. Other than that, electrical and plumbing this week. 

For our next installment, tune in to find out where we'll be "cooking" until the kitchen is done. Dinner invitations welcome in the interim. 

WAHOOO KITCHEN REMODEL!!!

Tuesday, September 24, 2013

Kitchen Remodel Unofficially Started!!!

I am so excited to announce that I made the second unofficial step toward kitchen demo this evening. Behold, the dining room wall. Looking good. I know.
Allow me to explain. After badmouthing the grasscloth wallpaper in the dining room on video nearly five years ago, it has since really grown on me. I love it and wish it were in better condition. All things considered, it's not that bad, but there are some spots that would look better if they were patched.

Since we're taking out half that wall pictured above, between the kitchen and the dining room, this was the perfect opportunity to salvage some grasscloth to patch in. So that's what I did. Luckily, I didn't need very much. Removing wallpaper is not a task for the faint of heart. Removing more than half a sheet of wallpaper nonviolently is something probably only yogis could do. For the record, I am not a yogi. I got about half a sheet and called it good.
Next, I found a pedestal sink for the powder room we're putting in. I don't think I've ever written a sentence like this in my life, but ... it was the cheapest one Home Depot had. That probably just shifted your understanding of the universe, so I'll give you a moment to recover before telling you that it is a mere $54 for the sink and the base. It's the one on the right.
On a non-kitchen-related note, this brass beauty was purchased by the side of the road in Lapine, Oregon for $10 last summer. I'm in the process of painting the brass black, which is turning out to be a more tedious process than I'd anticipated. It'll look great in the upstairs landing though, which is where it will be living eventually.
Lastly, two seasonally appropriate items: pumpkin ale (the stuff from Kennebunkport, ME via Trader Joe's is better than this Blue Moon, but whatever)...
And this spectacular cinnamon roll with walnuts and two americanos made with locally roasted coffee from Great Harvest last rainy Saturday morning, following a trip to the farmers market in a downpour to get heirloom tomatoes. I'm fairly sure you can't get more Oregonian than that.
Demo on the kitchen starts Friday afternoon. Our contractor, Bruce, is bringing a trailer for us to fill. I'm simultaneously beside myself with joy that the day is almost finally here for that horrible, horrible kitchen to disappear, and terrified that my sanity won't be intact by the time it's over for me to enjoy it.

It's time, though. Our faucet has developed a dual-flow function, by which I mean, when you turn it on the water not only comes out of the spout but also conveniently comes out from around one handle. It also drips/runs constantly, regardless of whether we've turned the water off at the valve. On the note of sanity, I might blow up the kitchen myself if I have to listen to it dripping into one more bowl left in the sink.

Three more days!!

Saturday, September 14, 2013

Small Necessities

Finally, after four years and nine months, I installed a tp holder. It's Threshold from Target and I can't find it online. When the vanity was first installed, I couldn't stand the thought of drilling a hole in its beautiful walnut side. 
We had a really annoying toilet paper stand that fell over all the time, and then we moved. Upon returning, we just left the roll on the counter. The counter's not that big though, and it gets cluttered quickly, so I drilled a hole and went for it before I could change my mind. 

Tuesday, September 3, 2013

Closet Organization: They Don't Call It Labor Day fer Nuthin

I've had a vision that plagues me, every night when I go to bed and every morning when I wake up. A vision of a closet that's not full of stupidly wasted space. Instead, this is what I see:
It drove me nuts. UNTIL. I woke up last Saturday morning and decided this was the day. I'd been hatching a plan for better using the space in the closet, with its one dumb pole and skinny shelf that was making my leather bags droop.

As closets go, it's not that bad for its era (predating the master suite with walk-in, unfortunately for me and my herd of Coach, Minkoff and Rowley). It fits most of what we need to stuff into a closet, and I have an extra closet in my office that is a walk-in for overflow and formal clothes we don't use very often. There's also a row of cabinets (pictured below), in which we store out-of-season clothes--basically an entire wall of storage. But still, I hate wasted space, so I assembled my team:
  • Super Wonderbar
  • Hammer
  • Ear muffs
  • Assorted painting supplies
  • Drill
  • Faux Dremel Multimax (from Harbor Freight)
And went to work on the closet. Demo was pretty simple...
Although removing the two-inch nails that secured the shelf support to the wall left a number of these. Love working on a house with plaster walls. I wasn't anticipating having to spackle a bunch of holes...
...before glooping on a couple coats of paint to cover the unpainted strip the shelf support was concealing. Oh well. I managed to get two coats of paint on thick enough that I didn't need to do more, using perhaps the worst painting technique I have ever executed. (For those late to the game, this room took tinted primer plus four coats of blue for the mesmerizing cobalt you see here.) It involved a hack saw, a mini roller and the paint can. No tray. I'll let you wonder about that one.
Anyway. The weekend was a blur of touchup paint, rather unsuccessfully priming and painting the melamine panel that now divides the shelving from the poles (stupid primer said no sanding, but I should have known better than to believe it), LOTS of measuring repeatedly and an equal amount of leveling and adjusting.

Most of the materials used are from Lowe's, HD and Builder's Bargain, the motto of which I have mentioned before: "B-grade building materials may not meet code." How could you not love a place with that kind of winning marketing? However, four pieces of material were from somewhere much more interesting. The shelves were, in a former life, our kitchen cabinet doors. They had a lot going for them in terms of shelving.
  • already painted
  • flat and not warped, and already acclimated to the house so shouldn't warp in the future
  • kitchen to be demoed soon anyway
  • removing doors makes things a lot easier to find in kitchen
  • very sturdy (3/4"-thick plywood)
  • FREE.
It took me most of the weekend on and off, but we now have a closet that makes maximum use of the space and features mostly level shelving and poles. (The top pole slopes down to the left.) There's even extra space for hanging bulky stuff like hoodies that we'd both wadded up and stuffed in our dressers.
Now I can enjoy my pre-sleep and coming-to moments in peace, instead of being jarred by an unthoughtfully designed closet.

Next in the crosshairs: that alcove above Todd's built-in dresser. The only thing I've done to it is removed the wallpaper, and it's looked really pretty crummy since I did that four and a half years ago. Also, curtains or doors or something. Probably curtains.