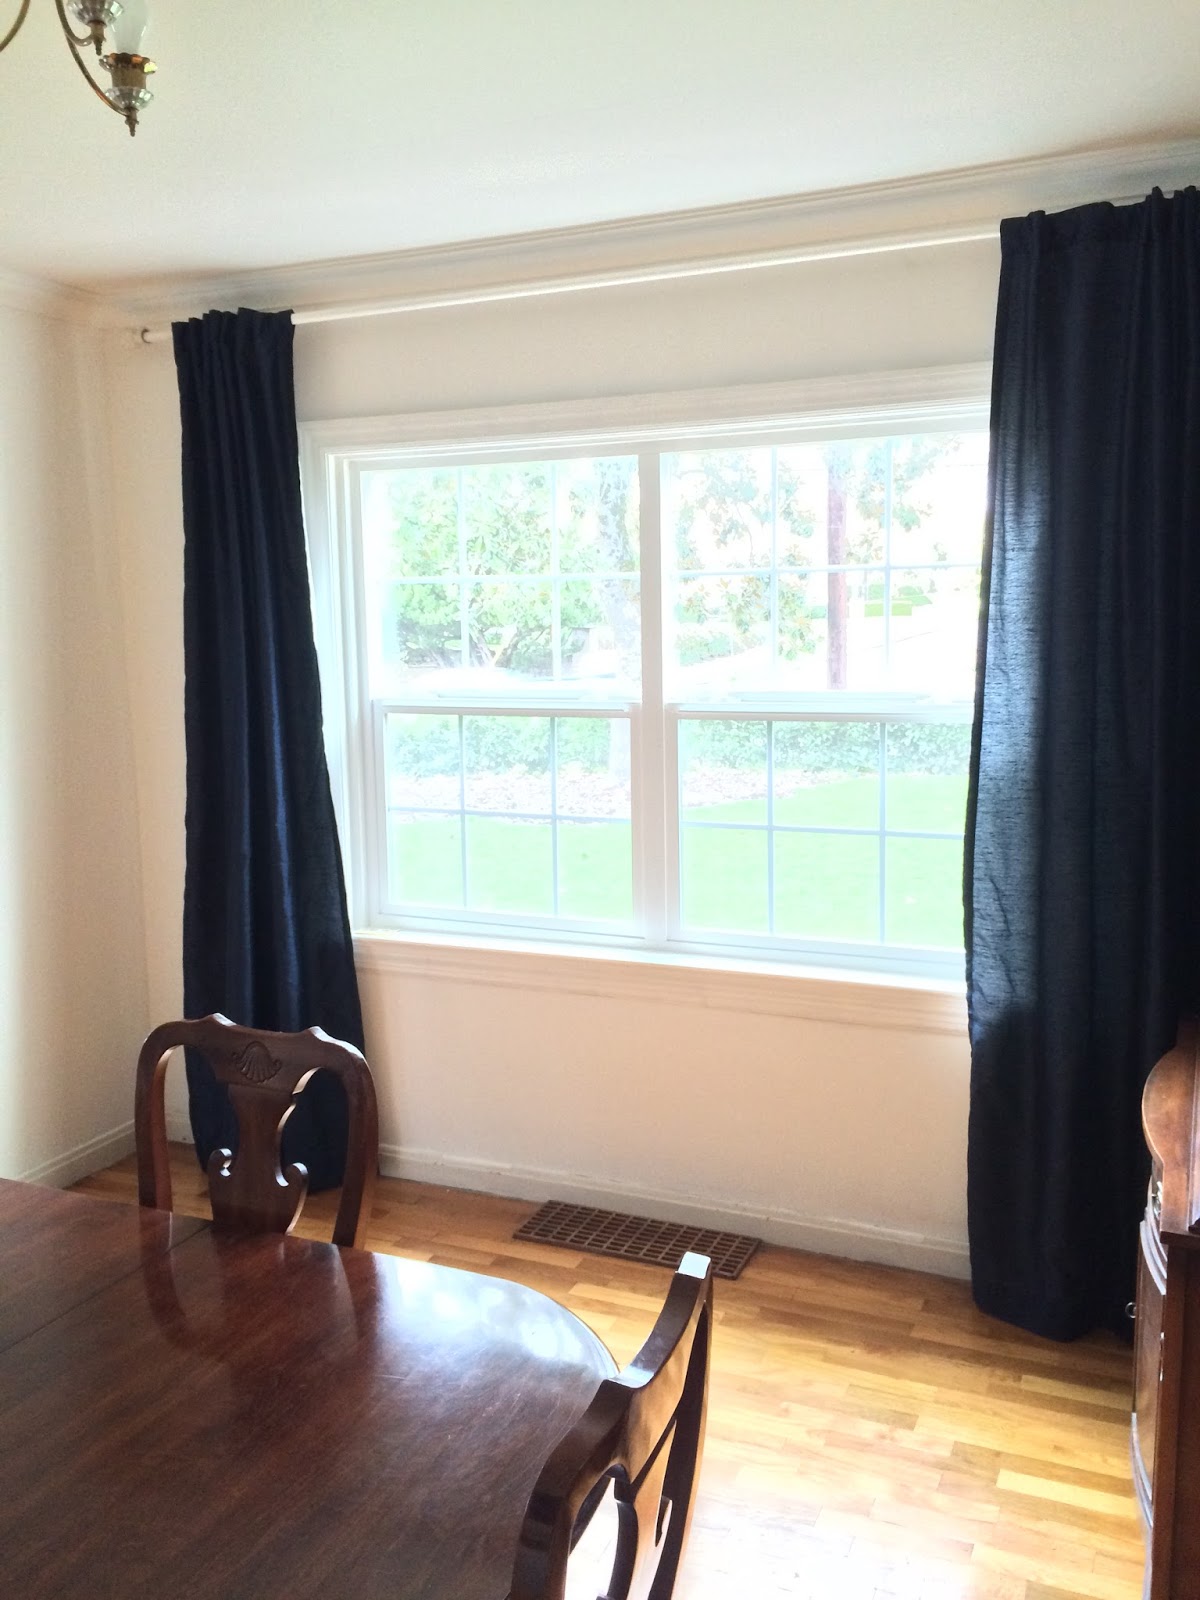
We've been working hard on a last push of projects with the intention of either selling or being happier living here (leaning hard toward the former, though, much to everyone's surprise), and removing the grasscloth in the dining room was one project I'd been avoiding.
I partially thought it would be a lot harder than it was, and I also came to really like the grasscloth, despite my initial spouting about how it would be one of the first things to go. (This house has taught me to say less, because I have ended up eating a lot of my words about it.)
So anyway, around the beginning of the year, Todd just decided to go for it and started taking down the wallpaper. It turned out to be a lot easier than either of us anticipated, and we had the whole room clean in two days or a little less. It was well worth investing in a wallpaper steamer all those years ago; it made the job as clean and easy as wallpaper removal can be.
(Anybody want to buy a china cabinet? I'm unloading it!)
I also used a drywall mudding knife to remove the paper and get a really clean swipe at the plaster beneath, which meant a lot less scrubbing to remove old glue before painting. The door to the paint closet still needs to be painted.
We discovered at one point that the trim was this color on the right in the photo below. GROSS. You can also see the vaguely mauve color of the trim next to the hinge, before we painted it 7 years ago. WHO PAINTS TRIM MAUVE? omg.
Just for fun, here are a couple of 8-year-old pictures from the first time we looked at this house. I have 36 pictures from that day in April 2008 and I look at them and seriously have no idea what I was thinking. Apparently I saw potential that I can't see anymore looking at them. Eek. Our realtor Linda is in the first one. She unwittingly named this blog when she declared the house to have "loads of potential" :)
Before we ripped out the wall to the kitchen, replaced the windows, finished the floor...
Just this week, the crown molding was finished. We still have to paint the ceiling (again) and replace the light fixture, but we couldn't believe what an enormous difference the white made in terms of how spacious the room felt. It felt like all the walls took a step back. We weren't expecting it to make that big of a difference.
But at least in some situations, that's what a nice bright coat of white will do for ya. For those wondering, our go-to white in this house has been Behr Swiss Coffee. It's slightly warm and slightly off-white, but not very much.
Years ago, shortly after we moved into the house, we needed to do some touch up painting on existing off-white trim and built-ins. I evidently didn't know you could get a custom color match and used my own high-tech method of eyeballing paint chips next to said trim. (All things considered, it didn't work too bad.)
My fatal flaw was that I didn't consider the fact that I strongly disliked that ivory color, and considering we were, you know, redoing the entire house, it was in my power to decide to paint it a different color. Live and learn. It borders on tan with the amount of brown mixed in, and it really doesn't do the bolder wall colors many favors.
I can pretty much tolerate it in the living room, and the bedroom is next on my hit list, but it was driving me redneck crazy in the office where everything else is white. It was all very incohesive, which bothered me because the office is otherwise the most-finished room in the house. It's decorated and accessorized just how I want, so this one massive, glaring "detail" really needed to change. There were a handful of other issues that were grating on me, too. They're noted in this marked-up picture.
Window casing painted. See how the crown and chair rail is so much darker? Not anymore!
Closet doors, for contrast. BLEH.
And after, with their cute little coral Anthropologie hardware. Anthro has the best hardware.
Removed tiny bits of wallpaper that we left on the wall when we removed wallpaper about five years ago and replaced scratched screws on outlet and switch plates, which makes a surprising difference in my little OCD brain. I also slapped a bit of paint on the old ivory outlet (the actual plugs). If you go fast enough with the roller, the paint doesn't get into the holes, which I'm guessing most electricians would say might be a bad thing.
Mmm...that crisp white against the navy makes my heart happy.
What else... painted the nuts and bolts on the light fixture so they blend better and finally touched up the ceiling where the old fixture was. We put this in almost two years ago. Sometimes I move slow on the things that annoy me the most. What you'll notice from this picture is that there is no dirt halo around the base of the fixture and that you don't see two silver bolts sticking out on either side of the base. It just looks normal.
Painted the white wall with a fresh coat of more-scrubbable eggshell finish, instead of the primer (possibly just a dead flat paint) that was there (again, from five years ago). It was in rough shape, whatever it was. Lots of holes, some bad, unsanded spackling...it just needed a fresh coat of white.
Not fully put back together, but looking so much crisper.
I've felt thankful every day that I've had this time to knock out all these projects (and there are more to come I'll be posting in the next few days). I'm actually kind of excited now to start working again in my finally finished, not-annoying, cohesive office.
Well, it's almost finished! Here's what I did this weekend...
Turns out two coats of blue was mostly enough. There are a few spots that could stand to have a third coat, but since so much of the paint is covered by furniture anyway, I decided it would be ok. I'm also going to be doing a little shuffling when the chair rail goes up, so if I decide that it really needs another coat of Midnight Dream (the paint color), I can do it then. After painting and reattaching the baseboard (in above and below pics -- quarter round will be installed at some point)... I swept and scrubbed the floors to clean up any stray wallpaper bits and glue. Fun fact: a little WD-40 will remove dried Kilz2 primer from a wood floor. Painted the door wall white -- it too could probably do with another coat, which I might do this afternoon. I think the blue looks really sharp. It's very crisp and dark and gives the room a nice weight. Weight is good, since it gets so much light. Having the walls be almost completely white (if I'd done white wainscot instead of painting) would have been too much, for me anyway. I particularly love the contrast of the blue with the stripes of the curtains and patterning of the wallpaper. And the three shadowboxes that I made a few years ago for our previous home in Pasadena finally got to come out of storage. They're on the left, and are a PERFECT fit in this room. The top has four shells, the middle is a piece of coral, and the bottom is a sand dollar. One more...ahhh..love it!! Ok, enough inside. This morning, I was delighted to discover one of my white pumpkins has sprouted! (Crappy pic...) This is one of the pots next to our front porch. This flower is called mimulus (aka monkey flower) and I saw it in Boothbay Harbor a few years ago. I took a picture, but thought I'd never be able to identify it and buy some. The Grange had them a few weeks ago, and I was SO excited. The color is unbelievable, and they're just right for the part-sun location in front. Around back again, two of my dahlia tubers have sprouted. One's picture below... And my sunflower seeds have also sprouted. I'll give them another week or two in the bed, then transplant to the fence behind the pool and other places they can reach their full FOURTEEN FOOT height. This is the honeysuckle I brought with from California. I transplanted it last year next to a dead tree so that it'll grow up it and look like a honeysuckle tree eventually (and attract hoards of hummingbirds right outside my office door!). It's doing quite well. Lastly, I got a great deal on these hanging baskets, which have little red petunia starts and blue salvia starts in them. More to come on those, eventually.
In the last few days, Todd and I decided it was time to finish my office. I think it's really weird that this is how most things get done around here -- one of us just decides to rip down wallpaper, paint, whatever. The bathroom was the same way: "Wanna redo the bathroom?" "OK." Commence demolition.
Anyway. You may notice from the photo below that the last papered wall in my office (sporting a jaunty gold and brown pattern) is now gone. Todd and I each took a side of the door, and since it was only (only!) two layers, it didn't take too long. My office was back together for all of a day and a half, before we went to Home Depot for a gallon of navy blue paint (last night). I also brought along the gallon of pink primer we had left over from the living room, in hopes that they could tint it purple or something so I could use it (they did). FYI, dark colors require a tinted primer, or it's at least recommended. Because I did a somewhat mediocre job removing all the wallpaper paste, I figure the primer helps the paint adhere a little better. and angle number two...
I actually kind of liked the purple. It reminded me of a color that I wanted to paint my room as a child (but was not allowed to). I think it's possible that I'm working out these childhood color-deprivation issues all over my house (blue bedroom, red living room, plans for a yellow kitchen...)
Then, first coat of blue paint. This is Behr...navy blue. I actually don't know if I looked at the name of the color (a first) because we marched in to the store, plucked a few blues from the chips, compared for about 30 seconds, and decided on a color. No taping to the wall, no testing at home, and hopefully it'll be ok. So far, looks fine.
I have to say, I'm a lot happier with the coverage from this blue than I was with the blue in our room (which is more in the royal family than navy). Maybe it's the purple primer (rather than the gray we used in the bedroom), but one coat looked good (despite some streakiness, which is to be expected) and the second looks like that might be all it needs. Nighttime and light bulbs are deceptive, though, so I'm not holding my breath. I will say that it's a whole lot less of a pain to paint when you're not taping everything and trying to avoid trim and whatnot. I ripped off the baseboard last fall, so it'll get repainted separate from the wall.
This whole setup with the blue paint is a departure from the original plan. I was going to install hair-rail height tongue-in-groove pine paneling around the room, painted white. Well, sadly, I bought it too far in advance, let it sit in the garage and warp for nine months, and when I finally went to put it up, it was all bendy and weird. Then I thought I'd do white wainscoting, because it's less campy, but it was kind of expensive. So I had unpainted, unwallpapered plaster walls for a year, until I was inspired. Chair rail is cheap (.50/ft) and classic (a drawback with the paneling, which would have been questionable and rather permanent). WIN!
So, navy paint under the chair rail, the wall with the door outside will be painted white and possibly have a sailboat painted on it (in a very simple, monochromatic way, not like a mural), and BAM! Office complete!!
I'll put up some additional pix when it's all done. ALSO. Pictures of the garden are coming. I can't believe it's been three weeks since we got everything planted!
Todd worked on removing the bulk of the rest of the wallpaper in the kitchen last weekend, and it looks SOOOO much better without those dark walls (and having only one kind of wallpaper is a definite improvement too). Seeing these little changes makes me really excited for when we redo the kitchen (still postponed indefinitely, sigh....) because I think it's going to turn out gorgeous.
In case you'd like to compare to what it looked like before, here's that...
Now the "only" problem is those hateful stripey red curtains. I honestly don't know what is wrong with me, buying curtains to quasi-match wallpaper I had plans of removing. BOY do I wish I'd bought blue ones.
Worked on a couple of projects in the past few days. A few night ago, we decided to paint the trim in the dining room. Someone who lived in this house at some point had an unfortunate affection for the color mauve, as evidenced by the color of our coat closet, and the trim in the dining room was sort of tinted muave. The color's just subtle enough to not be horrible, until you compare it to the fresh paint (new is left, old is right). I still have to paint the bookcases, but that won't take too long. Contrary to what you might believe about a nice coat of paint freshening things up, we stepped back and realized everything else in the room now looks WORSE than it did before, by comparison. Luckily, painting the ceiling and adding quarter round (aka base shoe) around the floor should help with that. And replacing the light fixture, which evokes such words as gaudy, grotesque, tacky, abominable...
Yesterday, I started ripping down wallpaper in the kitchen. Here is a before:Sorry it's dark, that was kind of the problem to begin with. That, and it looked like a bruise. Anyway, in typical fashion, there are/were at least three, if not four, layers of wallpaper on our kitchen walls. The top layer, the red, is vinyl, so that ripped off easily and left a paper backing that steamed off, no problem. Underneath...Cute vintage wallpaper! Well, some of us think so. Todd walked in and said he thought I was taking down all the wallpaper. In his words: "You took down one layer, found something creepy, then quit." It reminds him of what was upstairs, but I like it and he said he'd try to get used to it. What a guy. Here's a closer shot:It's not the greatest stuff in the world, but it's a lot better than the red. I'll post a pic when the whole kitchen is un-papered.
Oh, one other thing. In the past few weeks, I have successfully fixed two lamps. One (the nickel lamp) I replaced the switch on and the other, my desk lamp, (which I don't have a picture of) required a replacement socket and some other assorted finagling. My first attempt with my desk lamp resulted in a tripped circuit. All in good fun. I would say that these two successes and also the light fixture I replaced qualifies me for most electrical jobs. HA.
Here's how the office project was supposed to go: 10:00 am Wipe down old wallpaper to rid of dust and cobwebs 10:30 am Lay down dropcloths, set out equipment and materials 10:45 am M & M break 11:00 am Put up wallpaper 6:00 pm Finished! Have dinner.
This is how it actually went: 10:00 am Wipe down old wallpaper. 10:02 am Mom decides old wallpaper needs to be removed. 10:02:30 am Stew about how people at wallpaper store were wrong. 10:03 am Start removing wallpaper (I'm very thankful for my little Wagner Power Steamer. Made things move much more quickly). 2:00 pm Realize that since we'll be wallpapering to bare plaster, we need different stuff to apply the wallpaper. 4:30 pm Zoom over to wallpaper store before they close to get new stuff. Cost: $30. Grr. 7:00 pm Finish removing wallpaper. Floor covered with gobs of dried old wallpaper and paste. 9:00 pm Roll on Shieldz wall prep. Also, paint toe by accident and drip on floor (don't tell Todd) because you are too tired and irritated to put down a dropcloth.
Day II (which wasn't supposed to happen!) 10:00 am Start papering. 6:30 pm Stop papering to go have dinner with in-laws. 9:00 pm Finish hanging last three pieces. 10:30 pm Glare at wallpaper and mess in living room on the way to bed. Finally finished.
Before, you may remember that the wallpaper in my office was a rather nondescript tan and gold pattern. Following our wallpapering job, it turned out like this:
This is a closeup of the paper. It's a white background with blue maps and charts. Also, my crafty mom suggested wrapping the lightswitch plate so I didn't have to get a new one.
For those interested (and I have had a number of questions) the location of the map wallpaper is here: View Larger Map
In the next couple of weeks, I will get the paneling cut to size and painted, then put that on the bottom part of the wall. I think I'm also going to panel the south wall, which I'd been planning on building bookcases into. That might happen sometime in the future, but I think I need to learn to make things that don't wobble when someone sneezes before undertaking that project.
I had intentions of writing about all our adventures in houseland, but then upon returning from Thanksgiving in Chicago, I got a little busy. In the shuffle of moving, the video of the inside of the house got moved to an external hard drive, which is....somewhere. But here's what the outside looks like:
[
In particular, Trevor (Todd's sister Kate's husband, who also happens to be a brilliant craftsman and our general contractor) and I spent nearly a week acquiring a much more intimate knowledge of the then-unfinished red oak and red fir floors of this house than I ever had any desire to.
Trevor took the lead on the project, renting the machines, whining about how expensive they were and getting us a better deal, sanding for days, and applying the clear oil-based polyurethane we decided to go with. I pulled carpet tacks, vacuumed, helped sand, breathed a lot of fumes from our propane shop heater (these were the pre-heat 40-degree-on-a-warm-day days), breathed a lot of mineral spirit fumes, and pointed out puddles of poly as Trevor applied. After the sanding sealer was put down, we saw how the floors would look at the end. I was amused to discover that they look exactly like some other wood floors I'm familiar with: those of my parents' house.
When I wasn't breathing fumes and getting in Trevor's way, I spent my time in the back bedroom, an approximately 12x12 room that Todd and I will use until Phase II of renovation (the still-under-committee-review upstairs dormer window). The back bedroom sported at least three, and in some places four, layers of wallpaper. After doing my research, I tried several methods of wallpaper removal. In the end, I settled on a combination being the best.
After peeling off as much dry paper with a putty knife as I could (which was remarkably therapeutic), I scored the surface with a PaperTiger so that the solution and steam could penetrate more deeply into the paper. Then, following Mom's advice, I mixed up a batch of warm water and cheap fabric softener. The problem with this was that my solution was originally too weak. You'd probably want a 1:1 or 2:3 ratio of water to fabric softener. This I sponged onto the roughed-up wallpaper. Sidenote: this is pretty messy work. I used long dishwashing gloves and put down drop cloths. When buying drop cloths, buy thick ones. I got a few that are canvas on one side and pvc-rubber on the other. The paper and glue that comes off the walls is messy and gloppy, and it makes cleanup easier if it's not all over your floors. I tried to work in sections of about five lateral feet at a time (we have eight-foot ceilings) and not work too far ahead of myself. If you bite off more wall than you can chew, it just ends up drying before you get there. No harm done, just a little work wasted.
After letting the fabric softener solution soak for a few minutes, my Wagner Steamer was boiling and spitting water everywhere, so we were ready to go. (Another sidenote: I thought I'd be smart and mix a little fabric softener in the steamer. It kind of worked, but it dribbled tons of water everywhere. I figured it wasn't best for the baseboard or the carpet, so I quit. If you're on a tile surface though, you might consider it. I also don't know if it could break the steamer or not...try at your own risk.) I used the large steam plate most of the time (about 8"x11") and held it to the wall for 20-30 seconds. The key here is working slowly. We used the mini-steamer (which Todd referred to as "purse-sized") for trim along windows or small areas; it works much faster because it's more concentrated.
For cleanup, I found it worked best to a) wear gloves when picking up all the wet, gloopy wallpaper, and b) leave it overnight to dry a bit and do cleanup in the morning when you start again. I know it runs contrary to cleaning up messes after you make them, but if you can do this, it makes the whole thing more pleasant.
After the walls were done (two weeks after I started; it was probably about three or four full days) I wiped them down, knocked off any leftover bits of glue, spackled all the holes, opted to leave the quarter-sized chunks of plaster that had fallen off the top of the ceiling on one wall in favor of crown molding, and prepared to paint.
Here's what that looked like, pre-paint. Wahoo!!
I put on my painting clothes and marched down to our friendly Home Depot. $85 later, I was headed home with brushes, rollers, two gallons of gray Glidden Gripper (tinted for dark colors), two gallons of Behr flat enamel in Sailboat, and grand plans of having a painted room by sundown. Life happens to plans, though, and Todd and I were happy to have gotten one coat of primer up by bedtime.
Primer-ed, the room looked like this:
One coat of paint in, we were all a bit worried. The supposedly navy Sailboat looked like this....
I was still happy though.
One week, three rollers, and an extra gallon of Sailboat later, we were positively ecstatic to have a room that looked something like we'd envisioned. Several lessons learned:
1. They tell you to tape off trim every coat. We cheated. We did every other. I got away with this by using a very sharp utility knife to razor the edges before taking the tape off. I don't exactly recommend this method, but if you're impatient and ok with a bit of imperfection, then it'll be just fine. I can't even see where I did it now.
2. Paint in daylight, especially with dark colors. There was blobby paint, visible only after it was dry. This I remedied with a little 150-grit sandpaper before the last coat. Everything looks great now, but you just can't see what you're doing without bright natural light.
3. Just use new rollers. Maybe I'm the dummy here, but it seems like we made a bigger mess trying to save our rollers.
In the rest of the month or so since we closed, Trevor has redone the fireplace with red brick (that we got a great deal on--clearance!!), our chimney guy, Gary Matheney of Jacksonville, OR, has been hard at work fixing the chimney and replacing the flue liner, Metal Masters installed our new gas furnace and air-conditioner, the floors are dry, we moved all our stuff in the weekend before Christmas, we're buying furniture, our electrical service was upgraded to a 200-amp breaker box (from a 60-amp double-tapped fuse box), and we have a local phone number. I also cut down a dead tree (which our wonderful neighbor chopped up for us), we raked several months' worth of oak leaves, bought and painted molding for the bedroom, ordered a new door for the crooked slider, and we almost installed a new front door. We've been busy.